Adding a new user
Anyone from your company that is required to manage and work on bookings must be set up as a user.
Instructions
Within topbox navigate to Setup > Company > Users.
Click the + button.
Enter their Name and Email address:
Each email address must be unique to topbox. If you enter an address already stored on the system a red error message displays.
Enter their Role:
Admin: This role gives full visibility of all screens and pages.
User: This role hides the dashboard financial data page and replaces it with a logo.
Enter their Status:
Enabled: Providing the Start Date is past or current, the account is activated on completion of the task.
Disabled: Selecting this option deactivates the account immediately.
Enter their Start Date:
Note that entering a future date ensures the account is not activated until that date.
You are not required to enter an End Date. You can enter a leaving date here if the user leaves your company.
Enter a Homepage:
When Role = Admin: Select the user’s homepage on log-on. If Dashboard is selected, full view of financial data is displayed on the dashboard.
When Role = User: Select the user’s homepage on log-on. If Dashboard is selected, financial data is replaced with a logo on the dashboard.
If you wish the user to be notified of bookings made in the Customer Portal, enable Send Portal booking notification email.
Click Save.
Result
The new user appears in the list of users for your company.
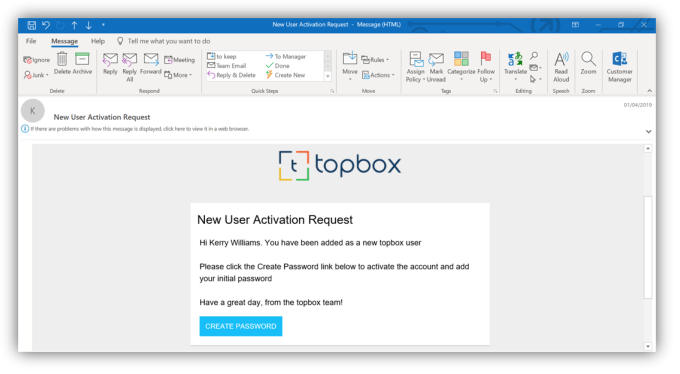
A New User Activation Request email is generated and sent to the email address of the new user. They are required to click the Create Password email link to complete the activation process.
For security reasons the activation email link expires after 24 hours. Should the new user try to create the password after this time, they must click Create Password > Forgot Password to request a password reset.
Updating a user
You can update the details of any existing user. This could be simple changes to name, email address, role, or activating and deactivating the account.
Instructions
Within topbox navigate to Setup > Company > Users.
Click on the name of the user.
Make required changes.
Click Save.
Result
The existing user details have been updated.
Users updated from Enabled to Disabled status are no longer able to log to their account.
Users updated from Disabled to Enabled status are now able to log to their account.